Saturday, October 26, 2013

RENDERING LARD


snow white lard!

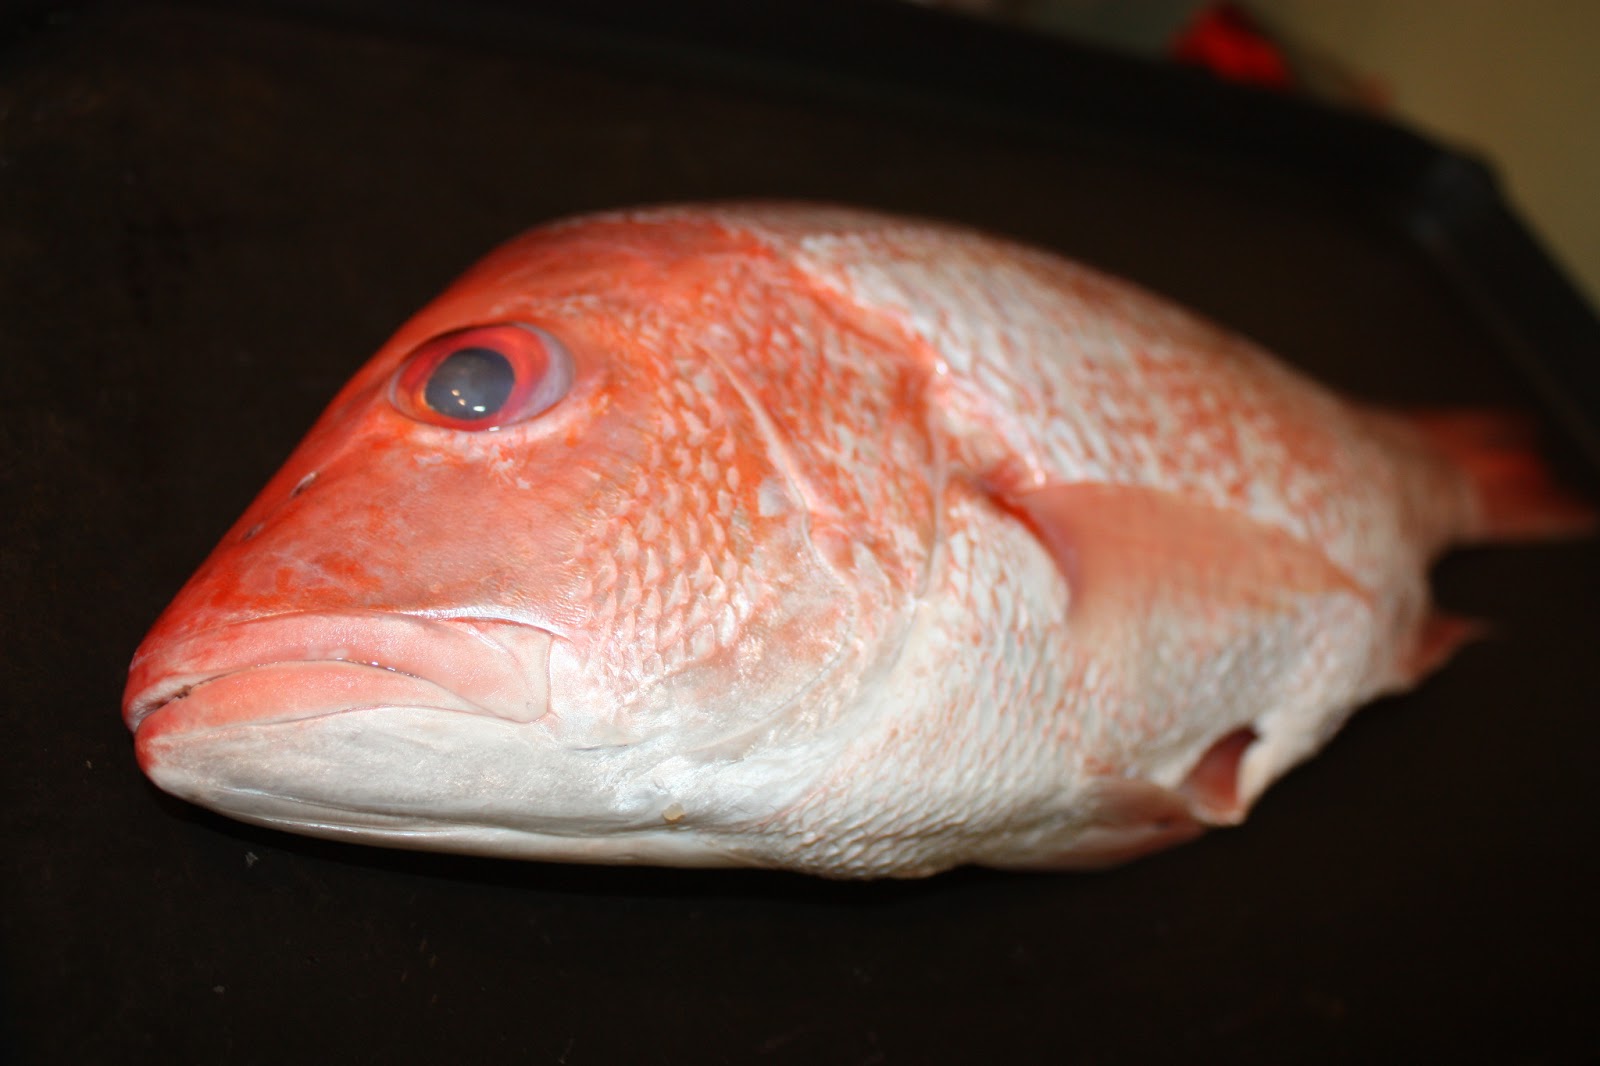
This is snow white lard.  I seriously love to eat it by the spoonful!  No, not really.  I do, however, enjoy the satisfaction that comes with rendering. From the farm to my cookies, or my deeply fried french fries.  Do you love it too?  Have you ever eaten an incredibly flaky pie crust and suspected one of life's most delicious ingredients had graced your plate?  Have you ever eaten a french fry or potato chip that just blew the top of yourn pretty little head clean off because it was so YUMMY!?  

You can actually produce this stuff in your own kitchen.  It's pure, unadulturated, healthy lard.  What? Healthy?!  Yes, it actually comes in at a close second to olive oil in the monounsaturated fat department, plus, you can get away with heating it at much higher temperatures.  To learn a lot more about the great benefits of choosing home made lard check out: http://www.weedemandreap.com/2013/02/the-top-3-reasons-why-you-should-be-eating-lard.html 


Now come with  me on a journey of learning to render!

What comes first?  

Sadly, this does:
adorable sweet baby piggy nibbling on my kid's foot
*GASP!* I don't blame you if you 'x' out this tab now and never eat pork again.  Before you leave me though, please know that this particular little piggy was not harmed in the making of this blog.  For all I know, he is still enjoying his life as one of the most intelligent of God's non human creations over at Mulberry Lane farm in Hilbert, WI, perhaps sampling all sorts of Converse: high-tops, low-tops and all-stars in varying colors and sizes.  

My husband literally brings home the bacon from a wonderful man who hails from just over the river and through the woods on a different little family farm.  The piggies that we eat are also super cute as babies. They love to frolic around the yard, jumping high, capering around, basically making you feel evil, Charlotte's Web style.  The farmer really does win blue ribbons at local fairs.  We are so blessed to get our beef and pork from them!  It's hard for me to fathom going back to wondering what the poor meat on my table went through before it even got the grocery store...  I am very glad that the animals we eat weren't treated cruelly.  They are literally the happiest pigs on earth for the duration of their rather short lives.  I realize that not every one is so blessed, but I do hope we all steadily move in the direction of caring a little more about our health and all the animals in our care!

Oh, you sly dogs, you got me monologing!  Let's skip to the part where I get serious in my kitchen.  When my hubby brings home our piggy goodies once a year, he hands me a couple of bags of fat.  It looks super gross, like fat should.  I thoughtfully took a picture for you.  You're welcome.
FAT

That is a very large stock pot.  This year I  had two of these tall boys chuck full.  Thankfully, the butcher grinds the fat up for us.  This is not the very highest quality of fat, which is 'leaf fat'.  I guess leaf fat is not very porky smelling and comes from a certain part of the pig.  Mine, however, is the whole hogs worth.  (Hogsworth sounds like a Dicken's character.  He probably has the gout.)  If you can't get it pre-ground, chill it in the freezer to cube up easily with a knife.

The heating part is super hard!  No, not really. Now, heat it slowly in the oven with just a little water in the pot or pan.  A cup should do for several pounds of fat.  Adjust accordingly.  The water will keep it from browning up on the bottom and will evaporate out. 
Just press the fat pieces against the sides of the pot/roaster occasionally to speed up the melting.  This process takes about 3 hours or so, depending on how much you are working with.  Just check it every half hourish.  When most of it's clear and the meaty bits are the minority, no longer pink, then carefully remove it from your heat source and pour it through some sort of straining system right into your storage containers.  If it is scentless, then congrats!  That's awesome!  Fact is, it may smell a bit porky, but no prob, as it cools, it will be less and less so, in my experience. Here is a picture of it right after being poured.  It is yellowy or, a golden brown in the case of  LONGER cooked batch.  The dark stuff is not bad lard, it is just porky.  It will cool to be white too, although perhaps not as brilliantly a blinding white.  Not awesome for some baking, unless that's your thing.  In that case, go ahead, pork up those apple pies.  Make sure to label the product before it cools as it may be hard to see the difference when it cools completely.  I didn't get a picture of this because I'm blogging while it cools.  Right. now.

Frying lard is on the left and baking is on the right.  One will be a nice snowy white, the other a pretty good white.
It would have been wise to start it out at 300 degrees Fahrenheit, but I tried 200 degrees, which took for literally ever and compromised the quality of the product. I over cooked one kettle into what the Mexican community calls: 'monteca'  whereas their snowy white lard product is 'monteca blanca'.  This is great frying lard, so no harm done.  Mexicans also apparently use 'monteca colorada' which is flavored with paprika.  Did you ever live near a Mexican family whose home is fragrant with that warm deep-fried smell that just makes you wish you were inside every time you pass by?  And not just because your mouth is watering;  You just know the whole familia is sitting around in the kitchen or the yard, enjoying not only home made tortillas, tacos, tomales and beans, but comfortable conversation with all their neighbors and friends. "¡QuĂ© preciosa casa!"

A little thinking ahead will go a long way during this straining/pouring step.  Have your preferred containers clean, dry and ready on a protected surface.  Tupperware, leftover sour cream containers, or balloons.  I think newspaper spread over your table or counter is a great option.  Plastic wrap would work.  Use whatever you can discard without scrubbing down your whole kitchen.  A canning funnel came in handy.  A strainer lined with paper toweling or cheese cloth will work great!  I just read that some folk will line a colander with a terry cloth towel and pour their goodies through that into a large baking dish.  The lard is then cooled in the refrigerator and later cut into bars with are wrapped in waxed paper, like sticks of butter.  Muffin tins... the possibilities are endless.  You can see that I used gigantor half gallon canning jars. 
See the little pint of baking lard hiding on the top?  That means that I won!  I made more pretty white stuff than frying stuff!  For real, it is all super good, so whatever.

Here is the real prize that we didn't chat about yet:
CRACKLIN'S FOR YOUR MOUTH
CRACKLINGS!  That's good stuff!  I recently found out that nitrates (found in most bacon) give me terrible migraines.  (Ha, not the nice kind, but the terrible kind.)  These cracklings are so porky and crisp!  Add a little salt and you are in bacon deprived person heaven.  Explanation: This comes from the meaty stuff leftover in the strainer.  Just squeeze out all the excess lard liquids and spread it out in a cooking thing. Put the cooking thing with fat things in it back in the oven at 300 for a while, stirring til golden and crisp. I finished mine on the stove top.  Add a little salt.  Don't eat it all!  Put it on a salad, put it on baked potatoes, put it in your shoes and feed it to the birds!  Sprinkle some in the bathtub for a wonderful spa day!  Okay, don't do the last few things.  I have like, 3 gallons of unprocessed cracklings stuff.  I wonder if I can freeze it.  


Awkward wrap up with no smooth transition:  So!  Enjoy cooking with your own home rendered lard!  Substitute it for butter!  Oil!  Or butter!  Have fun! 

RECAP:
1.) heat pork fat at 300 degrees
2.) check every half hour, pressing against the sides
3.) when mostly clear liquid is left with plenty of meaty bits floating about, remove from oven
4.) strain into containers (do not use balloons)
5.) mark for frying or baking and let cool
6.) store in refrigerator or freezer 
7.) finish cracklings on their own so as not to ruin your lard 
8.) eat copious amounts of crackling
9.) blog about it like a boss


Saturday, June 29, 2013

GREEN SANDWICH WRAPPERS

So there you are... sometime early in the morning trying to pack a lunch for yourself or a loved one.  You poured your cup of coffee, mostly into your favorite mug, but don't have time to sip it.  There are a hundred things to do just to get together a sandwich and apple; one of them is: grab yet another plastic baggie or 'zip bag' (eh-hem Ziplock -eh) out of the pantry or drawer... but, oh no!  You're out!  Worse yet, you've filled up a goodly amount of the local landfill already this year and it's only June.  At least you can sip your coffee while you eye up the tin foil... the freezer paper...the terrifying plastic container (Ahhh.. Tupperware, choo) and lid cabinet... What could you do to turn this destructive cycle around!?

That's it!  Make these adorable earth friendly sandwich wrappers!


I'll show you how in three easy steps or less.  

#1) Save those bags.  I realize sometimes you can turn in an empty bag for a cup of coffee, but if you buy fresh and less expensive straight from a certain store (I can't say Starbucks, it's copy-righted), you can't redeem those anyway, so save those precious bags.

#2) Cut off the bottom, peel it open at the seam and cut around the rectangle to just trim off the gluey parts.  Don't be too concerned with perfect dimensions, but make sure to peel off the twisty tie thing and the freshness circle.  I also rounded the corners for a more uniform effect.


This BLT looks so elegant on this handy 'plate'
  

#3) Place 3 slices of bread in the center of the wrapper at an angle.  This gives you the approx dimensions of a sandwich.  Practice wrapping it up kind of like a burrito.  Fold down the top, then fold up the bottom, then I kind of tuck as I fold in the sides.  This shows you where to stick on the self adhesive 'hook material' squares.  (Can I use the word Velcro, or is it copy righted?)  

Hip, hip, Hooray!!

These things make an awesome plate for picnicking on your lunch hour!  Enjoy!


All kinds of Tips:

Use two squares of 'hook material' on one corner of the side folds for an adjustable sized wrapper.   I alternated use of two of the softer components of these squares with use of two hook components to most evenly use my materials.   Sometimes I eat big sandwiches.  :) 

My first attempt at this craft ended in a too small rectangle, so it is functioning as a veggie or brownie or cookie wrapper.

I tested the ability of the wrapper to keep food fresh by leaving my 'template' bread slices in a few over night.  Not only was the bread fresh, but I realized it was easily accessible to assemble the sandwiches the next morning; twisty ties aren't my friend first thing in the morning.

While you have the self adhesive 'hook material' squares out, why not use them to keep salt and pepper or other containers in place in lunch boxes?  My hubby has one of those manly construction type boxes in which everything gets thrown all around resulting in a mess if he wants any condiments at all. 

You know those concentrated drink flavor bottles (I can't say Mio, can I?) that you use to squirt into water to make it taste like a sugary drink? (I CAN'T SAY KOOL AID!)  The containers are great for on the go!  Fill them with mayo, ketchup, mustard, dressing, hot sauce, taco sauce, even hand sanitizer... just make sure you label them.

Friday, June 28, 2013

Red Snapper With a New Take on Rice and Beans

RED SNAPPER is so delicious when you can get it fresh from the ocean.  There is a wonderful sea food stand that comes to a parking lot near our quaint little neighborhood periodically through the summer.  We are on their mailing list because my hubby can't pass up the opportunity to enjoy such fresh crab and shrimp right at home.

 This is such an easy recipe that the pictures almost tell the story themselves.  As often is the case, we wanted to eat our food right away, so I didn't get a picture of it all together on a plate.   Sorry!  :)  To select a good fish, make sure the smell isn't too strong, of course, and that the eyes are clear.  This 2.7 pound guy made a light meal for four.  He had been gutted, but the scales were still on, so I used a steak knife to take off the ridiculously big scales; I'm used to cleaning pan fish like lake perch and blue gill with normal little scales that fly all over into my hair and turn me into a pretty mermaid.


If you want the rice dish too, then follow the directions on a good quality bag of long grain brown rice.   Adjust portion sizes to the amount of guests, of course.  When that is simmering on the back of the stove you just need to remember when to turn it off in the middle of fish prep and let it sit with the lid on to plump out.  I don't salt my rice while it cooks because it may be tougher that way.


Next wash with cold water inside and out then pat dry with toweling.  Pat pat pat.


a not too fishy fishy (he has scary teeth)


I took a big handful of course salt and garlic powder to rub all over inside and out.  Don't skip the inside!  Then I drizzled him with olive oil and lemon juice.  I cheated and used concentrate because I was in for the evening and out of the pretty yellow fruit.  Shhhh!   Don't tell!


Then, as you can see, I stuffed the cavity with some great stuff!  I coarsely chopped some vegetables and herbs: cilantro, garlic (about 2 cloves) a fourth of an onion and a lot of lemon oregano.  Yes, lemon!  It is so fragrant and wonderful!  My son thought I said pick 10 lbs of it for me out of the garden, so I now have some easy to access in the veggie drawer.  I store it in an open plastic food bag to keep it nice and new.  If you wanted to, you could use dill instead of cilantro or any combination of great herbs; thyme, rosemary... whatev, but I loved the effect of the cilantro and oregano.  The reason the skins are in the pic is because you don't want to eat the stuffing, it just isn't great.  I didn't bother with bread chunks or butter this time because I learned that the first time.

the half a garden's worth of oregano my son brought me when I said "a lot"


 Now set your fish aside and you can throw together the quick rice dish.  It's really basically a rice dish despite the beans.  I simply used two small cans of fire roasted tomatoes and a small can of light red kidney beans.  I think black beans would go really well, especially in keeping with the cilantro and oregano.  Is your rice tender enough?  Throw it all together then, go ahead!  No order!  You can't see it here, but I did add the rice with the other stuff at some point.  Chuck in some red pepper flakes to taste, some chicken base if desired for extra flavor, some butter or olive oil and ... wait for it... KALE!  A big beautiful bunch of de- stemmed kale ripped into bite sized pieces.  It is so very good!  Let those flavors marry in a simmering warm covered pan or pot while the kale wilts down a bit.  The reason I say wait til last on the Kale is because it can become dark and bitter after cooking too long. 


Throw some lemon wedges in a little dish and set the table because in a half hour your fish will probably be cooked to perfection.

Heat up your grill and when it's ready go ahead and place that fish in there and shut the lid.  If you don't like the smell of burning fish fins (who does?) ...like, if you have company over that may be grossed out, then wrap your fish first in parchment then tightly in tin foil.  This does make for extra moist meat, but I like the blackened grilled look a little, plus I was lazy this day.  Shhh!  

Wha-la!  1/2 an hour later (probably an hour total) you have an impressive meal with little effort.  My family RAVED over the kale rice dish.  Kale is so good for you and OMEGA 3s are great!  Enjoy!  

PS If any of my millions of adoring fans are dying to know how I make homemade napkins like the one that sneaked into the fist picture of this post, then please request a tutorial in the comments section. It is so satisfying and addictive!

Wednesday, April 24, 2013

Bean with Bacon Soup

Hi!  I want to tell you all about something amazing that happened to me!  My husband came home in a hurry to shower and leave again.  He needed something to eat, quick!  So I pulled out a package of bacon that we had thawed in the refrigerator.  It is wonderful, magical bacon, locally sequestered, but that is a whole other story.  Well, I opened the package and there were a few slices in there, enough for a sandwich, but the rest had accidentally (read miraculously) been neglected during the slicing process.  Who here doesn't love the idea of a side of unsliced smokey goodness just waiting for your creative hand to get to work?  I made the sandwich, with red peppers instead of tomatoes, BTW, which was a hit, then got down to the business of making a fantastic supper from this unexpected gift.  I knew right away to make a childhood favorite of mine.

                      Bean With Bacon Soup!!!

You can see that I chopped the hickory smoked bacon up into pretty 3/4 inch chunks.  I used about a half pound for 4 people.

magic
Next I set some gorgeous multicolored beans to boiling for a quick soak, because I'm impatient like that.  AREN'T THEY PRETTY?  These are from a generic brand ham and bean soup mix.  I used half the package. (about 8 oz) I sorted, rinsed and boiled these in about 5 cups of water.  When they had been boiling for 10 minutes, I turned off the water and let them sit for an hour.  If you do this, you should plan on rinsing them several times because some types of beans need to be rinsed, and there is quite a varied crowd here!
these are gorgeous... wouldn't they be cute as a fairy walkway or something?


Meanwhile I decided what vegetables to add.  I ended up using a half of a medium white onion, one large garlic clove, a half of a huge carrot, and one medium sized red potato.  Oh, and also a half of a celery stick and a bit of parsley.  I did end up adding a pinch of thyme and a bay leaf as well.  I chopped everything up fairly small, but the carrots and potatoes were 3/4 inch like the bacon.  See the onions and celery being minced?

chop, chop, chop

Next I got some other essentials ready for their debut.  Let me see if I have a snap shot. ...
not so natural ingredients


What?  Okay, I would normally not use condensed soup to make soup, but I had no tomato paste on hand.  Campbell's bean with bacon at my momma's house is what started this love affair anyway, so it is a nice touch.  TIP ALERT: This little jar of Better than Bouillon is some great stuff to keep on hand!  A little goes a very long way!


I used to work at a Thai restaurant, and the owner told me the more color on your plate, the healthier you are...and this is before the pretty beans! (Use a bowl, not a plate.)

Can you smell this?^  It is so so tantalizing!  At this point I have browned the bacon pieces alone in a stock pot, then added the vegetables and herbs all at once.  So easy, right?! See that great color on the bottom of the pot?  That's called flavor! Next, I poured in about 5 cups of water and the beans.  The milk is optional but don't add it yet if you choose it! If you don't use milk, add 2 more cups of water.  A person could whisk in the chicken stock paste (one Tbs will do!) before the liquid or after.  Let this simmer on low, stirring occasionally with a wooden spatula or spoon.  I recently heard this about using a meat smoker: "If you're lookin', you ain't cookin'!"  and I think that is true for soup too. Keep the lid on that pot!  Any time you can add the tomato soup or if you used paste (use about 2-3 Tbs) then add that.  Let it go low and slow for at least two hours.

Add the two cups of milk shortly before serving if at all.  Why the milk, you ask?  Well, I always used milk in my canned bean with bacon when I was a kid. So, is it just for nostalgia's sake?  That's what makes things delicious sometimes.  Milk gives this dish an off putting color, which is why I did not post a picture.  It's orange and tends to separate.  Don't add the milk til last if you use any at all.  Substitute those two cups with water if you want.  It will be prettier for sure!  Also, hold back on the salt and pepper til the end or the beans may become tough from the salt.  TIP ALERT:  Check each type of bean for a pleasing buttery texture before declaring it to be dinner!  They are all different and the little white ones were the most stubborn here.  


P.S. My husband was delirious over this soup!  He just about licked the pot clean!  Brandon does not always love my soups because he is such a traditionalist.  This is a very traditional soup with style.  Oh. Yeah. 

Monday, February 4, 2013

Sesame Green Beans

Are you ready for this?  Good!  Let's get to cooking some good green beans.  I think 'good' is the word of the day.  When you hear it (in your head as you read it, I mean) you can scream, Pee Wee's Playhouse style.  If anyone asks why you're screaming, you can show them this blog and they can make these awesome beans too.  Make sure to show them the post about Japanese Pan Noodles also so they can have a balanced meal.  Sort of.  Maybe we will add veggie spring rolls.

In the words of a good friend of the family... AAALLL Right! Here is your list of good ingredients:

one pound of fresh green beans

sesame oil

sesame seeds

garlic clove

soy sauce

fresh ginger

And this is what to do:  Clean and snap those beans to the length of your choice.  I would love to make this dish with those crazy long Asian green beans that I've seen at the farmer's market!  The next step is to blanch the beans in a pot of pre-boiling water.  You don't need to salt these because there will be soy sauce later.  After 2 minutes, rinse these in cold water and pat very, very dry!  It would probably be smart to use flour sack or another type of towel, but I just use a LOT of paper towels in the kitchen, please do not use as many paper towels as I do.  Once I did go on a paper towel fast for over a month! It was brutal and yet kind of freeing.

Now smash the garlic, peel it and mince it finely.  You can grate a nice chunk of ginger now too if you wish.  It slices and peels easily when it has been stored in the door of the refrigerator right next to one hundred and six black bananas.  (The bananas are not necessary, but I know they are there.)

This is the time to clean the sadly crumb be-speckled stove top around the burner if you are irresponsible like me.  Then, and only then, you can put a nice frying pan on med high heat and add, oh... about 2 Tbs of sesame seed oil aka two turns of the bottle over the pan.  You MIGHT want to check to make sure the bottle has one of those plastic things in it that makes it pour in a drizzle.  If it doesn't have that dealy... well... it's not funny.  

Right when your bat senses tell you the oil is about to smoke,  gently add all of those gorgeous beans.  You don't need to stir them immediately, but gently shake the pan occasionally during the next 2 minutes.  When you see the beans getting nice and 'scorched', aka get lovely color on the sides that are touching the hot sizzling pan, then you can toss on the soy sauce, garlic, seeds and grated ginger root.  Mmmmm! That smells good! (Did you scream like Pee Wee?  That's okay, I know it really is a boring word.) Gently shake the pan for another 30 seconds or so and then serve these bad boys nice and hot.  These can go with just about any meat and potato meal. 

I'm sorry there is no picture of this wonderful food for the soul to date.  I will add one the next time I make it!  I promise!


Monday, January 21, 2013

Japanese Pan Noodles

Hi, guys!  You are looking at my first official post.  I hope you like it.  The thing I want to make with you is: JAPANESE PAN NOODLES! These are pretty great.  Would you like to cook with me?  I suggest listening to the song 'Littlest Birds' by Be Good Tanya to get you in the mood to cook.  I really don't know how to get music on my blog yet, so until then, I will link or mention stuff I like.

I was pushed to post this by the fact that a Noodles and Company is opening up in my neck of the woods, which means I may not ever make this again!

If you do not have that awesome restaurant near you, then get all your ingredients together on your counter or table to make this -->
Ingredients List
Linguine noodles are my noodle of choice, but any similar one will do

Sesame Seeds, black 

Sesame Seed Oil (don't skip this, it makes the whole dish!)

Oyster sauce which you can find at any grocery store near the soy sauce

Soy Sauce  in your favorite brand

Rice Wine Vinegar (don't use rice-vinegar and wine.  I won't say how I know this isn't a good substitute.)

Chilli Garlic Sauce (this comes in a small clear plastic jar with a wide green lid on top.  It is a must. Coming soon: A post on delicious egg rolls and sweet chilli dipping sauce made with this magical ingredient!)

Awesome, Fresh, and Yummy Things: 
a knob of fresh ginger root, 
a handful of cilantro, 
one lime, 
one nice carrot, 
a few green onions, 
a large garlic clove, 
a few Shiitake mushrooms (although you can get these dry and rehydrate them and it is pretty darn good.  Do that first if that is the route you go)
and a big handful of bean sprouts.

Optional: Thinly sliced leftover steak or chicken, or cooked and peeled shrimp to put on top.

Then, you do it to it!  This goes fast, so hang on!  Boil a large stock pot of water for your noodles, just like when you are being Italian.  Add salt just like when you are being Italian, but remember to be Asian today.  Don't forget to turn on your exhaust fan if you have one.  Things are getting all steamed up now!  Have your noodles nearby, but don't tell them their fate, unless you are kind of mean.

Walk on over to your cutting board and get out your beautiful chef's knife.  It is essential to have a chef's knife.  With one of these, you can do anything you set your mind to.  If you don't know what a chef's knife is, check out my most favorite gift that I ever got myself by clicking here.

Now be careful to curl the fingertips on your helper hand inward to hold the fresh ingredients stable while you chop with your boss hand.  A helper hand is valuable, so you don't want to injure the little guy, do you? 

Chop up some green onions (like, oh, 4 of them)  into long, dramatic pieces.  You can slit them lengthwise first if you want.  Do chop the white parts more finely, though.  Push that aside and smash that clove of garlic to remove the skin.  Cut off the end and mince finely.  Take your time if you are new to this.  Your knife is sticky now, so rinse it and your fingers and move on with your life.  Julienne your peeled and cleaned carrot and continue doing that til you have matchstick pieces.  Click here to learn how to Julienne.  It's super easy.  Okay?  Now we can slice those Shiitake mushrooms into fat strips.  Just toss the stems.  If you have kept your ginger root in the freezer, it will be easy to deal with.  Carefully peel it with the knife, being respectful to that helper hand of course, then slice thin sheets off with the knife.  From there you can cut horizontally, then vertically until you have a very fine mince.  You want about 2 Tbs of this or so.  You can pile all this stuff together.

Did I forget anything?  No?  Okay.  By now your water is boiling, so add your noodles; enough for 2-4 servings, depending on who you are serving.  If I come over, then plan on me eating most of it, no matter what. Either way, you want about one small package of noodles for these instructions.  Keep them from sticking by stirring occasionally until they are al dente; or, firm to bite, but not too firm.  Strain in that cute colander you have waiting in the sink, then put them right back into the pot.

Just go ahead and add 2-3 Tb of each of the liquids and seeds (except for the chilli sauce, just add a small amount or skip it altogether!!!) then dump in everything but the lime and cilantro.  (If you want to enjoy this cold, which is my favorite way to eat it, if I can wait, then keep your meats out too so they don't get tough and weird tasting... then just mix them in before shoving this into the refrigerator for snacking on later.)

You want a medium to dark brown color on the noodles, so add a tiny bit more Oyster Sauce if you didn't achieve the color in the picture.

Stir this heavenly stuff all altogether on med. low heat for about a minute or two, then serve with the fixings on top or chill it for later!  I would suggest keeping it a secret, but your house will smell awesome, so it truly isn't possible.

Here are some pictures I took today.  These boys can't resist these noodles that we ate for lunch today, and this little-sweet-baby-girl-puppy is so good that she would never sniff the table.  Not buying it?  Sometimes she doesn't.

L to R: Zane, my youngest twin, Quorra, my princess, and Noah, my oldest twin.  One of the benefits of home schooling is that I can stop what I'm doing and take a photo shoot of my boys, who are apparently going through a James Dean phase, while they wrestle on the couch with the dog.  This pose was Noah's idea---->

Interesting fact: My father was named after James Dean.

Interesting fact number two: my dog was named after the girl with black hair on the movie Tron.  Who loves that movie?


Thursday, January 3, 2013

Testing testing

Test post: A list of reasons why I love Mulberry Farm

  1. Pigs are cute AND smart.
  2. The cow was very gentle
  3. The hayride brought back memories of my grandfather mowing hay in his field and letting us ride on the hay in the back of the tractor trailer.
  4. The horses didn't buck anybody off and one was endearingly pregnant.  (Her name is Thunder.)
  5. My kids loved the goats and all the other animals, but the kittens were their very favorite.
  6. The lighting was perfect for taking cute pictures of Leah and my twins!  (Leah is the little girl I used to get to babysit, and it was cute that she was terrified of every animal.)
  7. Noah found a renegade bunny and helped put him back in his home.
  8. We bought some jam that was delicious !
  9. There was a huge Mulberry tree there that reminded me of the tree by my house when I was just a little bitty thing.